"RESTORE"
Sand & Restore

What's There
Is Worth
Keeping.

Most floors that get ripped out should not be. The original boards beneath are almost always in better condition than the surface suggests — worn down to grey, marked by furniture, partially obscured under carpet for decades. Sanding back to clean wood and refinishing correctly transforms them without replacing the material that gives them their character.

Victorian Pine Edwardian Oak Parquet & Block Engineered Oak Dustless Sanding
3Sanding Passes
~99%Dust Contained
4Floor Types Covered
"RESTORE"
"The floor beneath your feet
is probably better than
you think it is."

Replacement is the easy answer. New boards go down quickly, the room looks clean immediately, and nobody has to think about what was there before. But in a Victorian terrace, an Edwardian semi, a period flat — the original floorboards are part of the fabric of the building. They are old-growth timber that is denser, more stable and more characterful than almost anything available today. Replacing them with new engineered oak is not an upgrade.

Restoration takes more time and more skill than a new installation. Assessing what a floor needs, sanding it in passes without over-cutting into the board thickness, matching repairs so they disappear rather than announce themselves, applying a finish that brings out the grain rather than flattening it — this is craft work. We approach it that way.

Before & After
What Restoration
Actually Does
Original parquet before restoration
Before
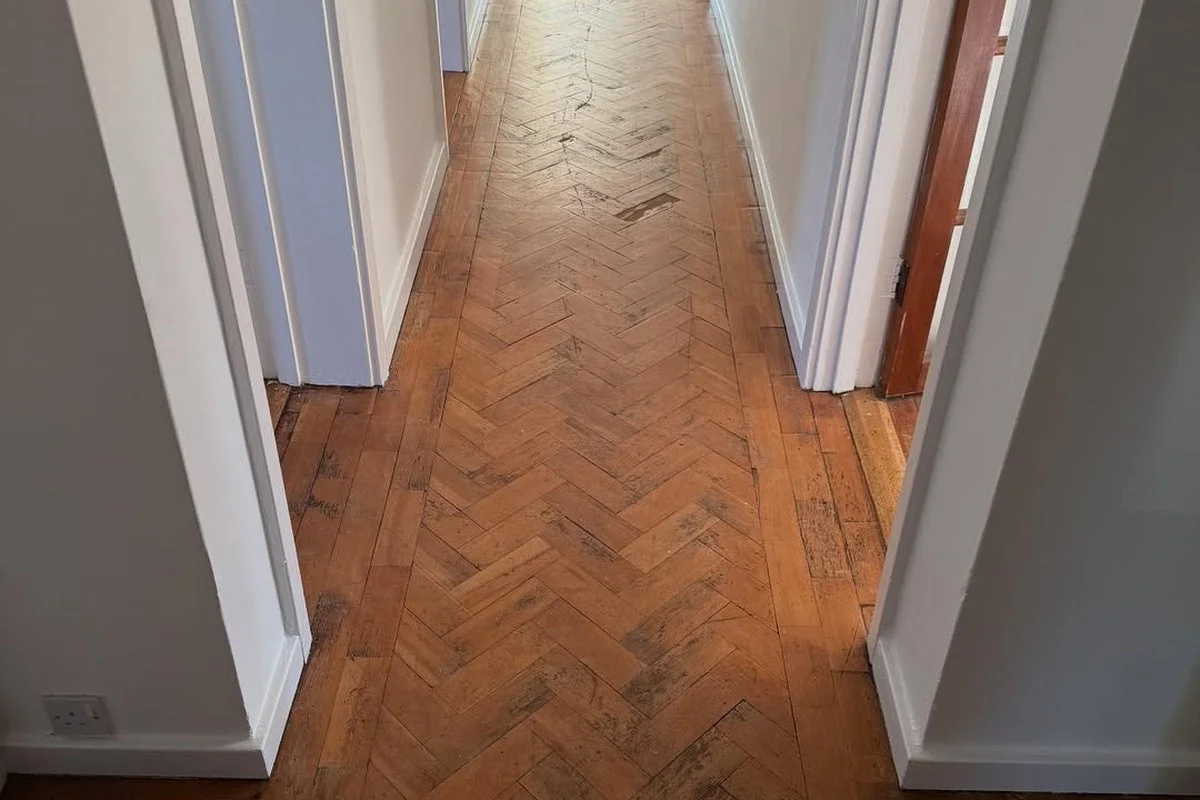
Original Parquet · Islington
1930s herringbone parquet — heavily worn, lifting blocks, stained with old polish

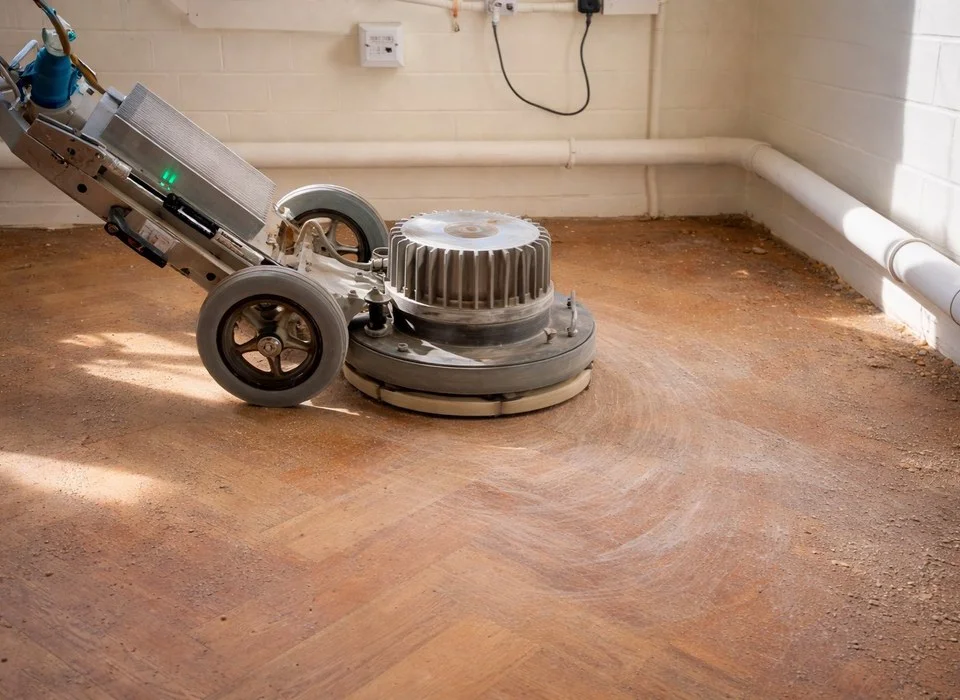
44 square metres of 1930s finger parquet. Approximately a third of the blocks were lifting or loose. The surface was obscured by decades of wax and polish build-up, and the original finish had worn through in the main traffic lines. The client had been quoted for full replacement.
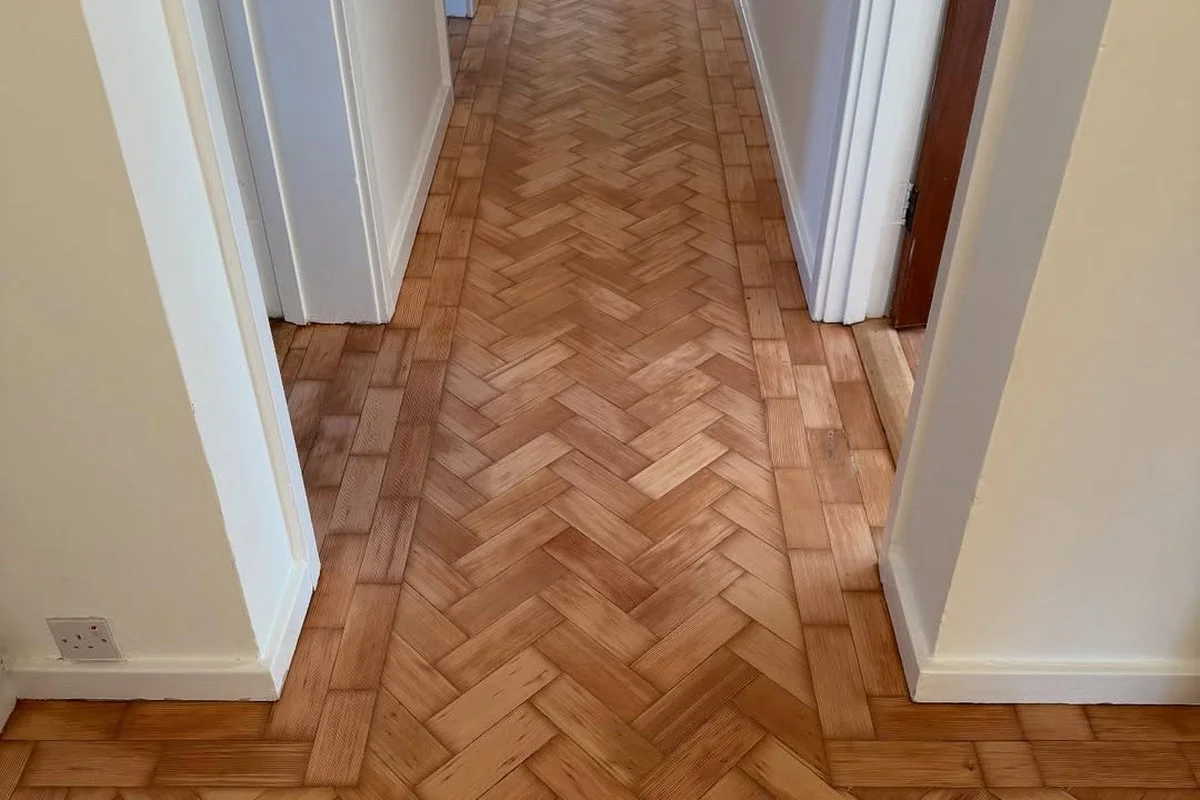
Parquet after restoration — refinished and relaid
After
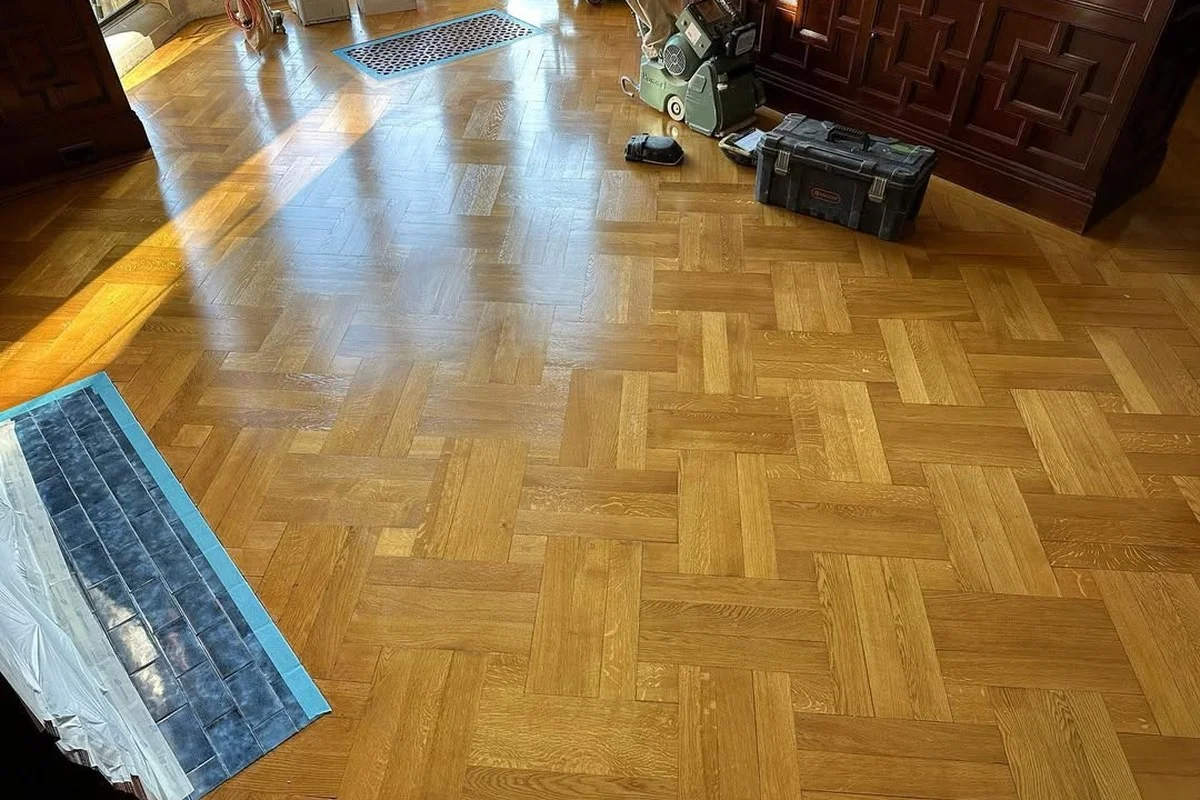
Restored & Refinished · Same Floor
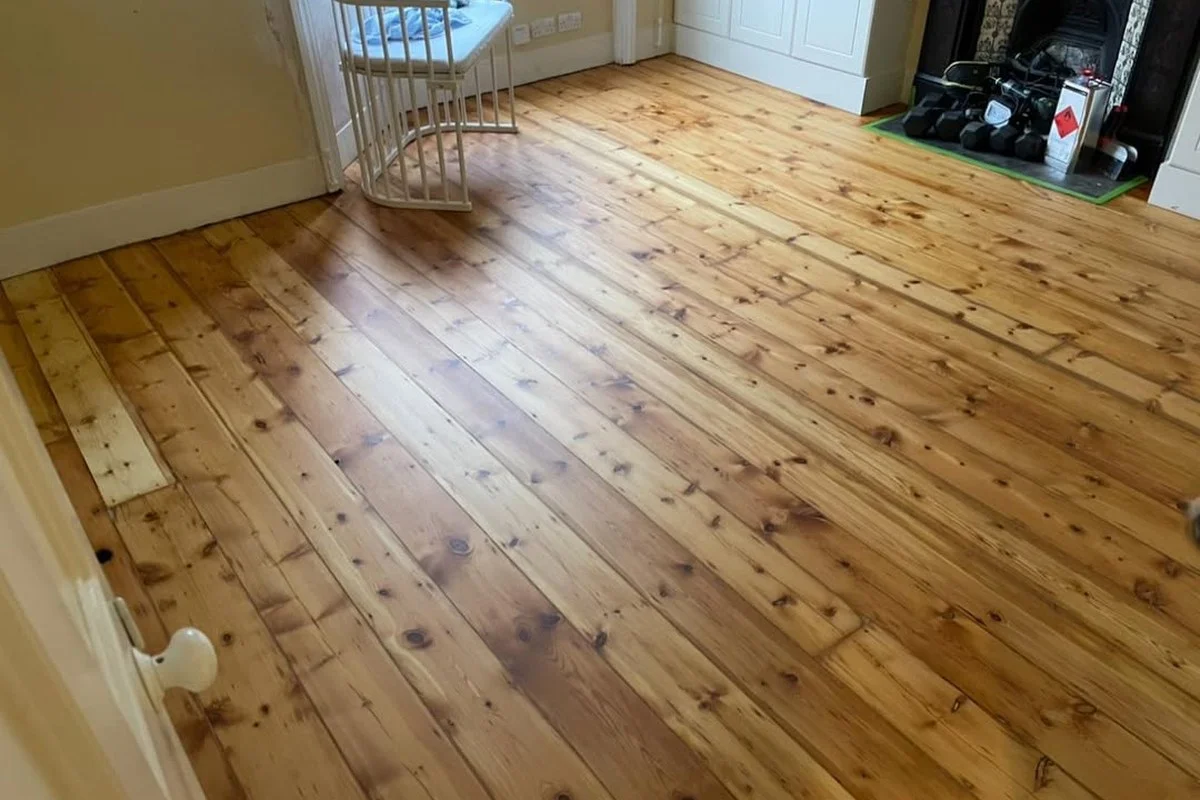
Blocks re-fixed, three-pass sand, hardwax oil finish — the floor the house was built with

Loose blocks were re-adhered and allowed to cure before sanding began. A coarse-to-fine three-pass sand removed the polish build-up without taking unnecessary material from the blocks. The hardwax oil finish was chosen to match the depth the timber had developed over ninety years. Cost: roughly forty percent of replacement.

What We Restore
Four Floor Types.
One Standard.
01

Victorian
Pine Boards

Original Victorian softwood pine boards — typically 100–140mm wide with a characterful grain — are among the most commonly butchered floors in London. They are routinely covered, painted, or replaced unnecessarily. Sanded back, they are warm, distinctive, and genuinely irreplaceable.

  • Three-pass coarse-to-fine sand
  • Knot filler and flexible gap filler applied between passes
  • Hardwax oil or lacquer finish
  • Board replacement with period-matched reclaimed pine where needed
  • Squeak treatment before finishing
Typical property: 1850–1910
02

Edwardian
Oak Boards

Edwardian oak boards — denser, closer-grained than Victorian pine, often laid in narrower widths — respond particularly well to restoration. The grain that emerges after sanding is almost always finer and more interesting than anything available new. These floors were made to last a century and they can last another.

  • Light initial pass to avoid unnecessary material removal
  • Grain direction assessed before sanding begins
  • Stain option available for colour refresh
  • Hardwax oil, lacquer or Osmo finish
  • Matching board replacement sourced from period stock
Typical property: 1901–1918
03

Original Parquet
& Block

Original parquet — finger block, herringbone, basket weave — is the most technically demanding restoration work we carry out. Blocks that have lifted must be re-adhered before sanding begins. The sanding machine must follow the pattern, not cut across it. The result, when done correctly, is extraordinary.

  • Loose and lifting block re-adhesion before sanding
  • Machine sanding follows the pattern direction
  • Edge and corner work by hand where machine cannot reach
  • Replacement blocks sourced to match original species and size
  • Wax and polish build-up fully removed before finishing
Typical property: 1920–1960
04

Contemporary
Engineered Oak

Modern engineered oak floors with a wear layer of 3mm or more can be lightly sanded and refinished — typically once, sometimes twice over the floor's lifetime. The result refreshes the surface, removes surface scratches and scuffs, and allows a finish change. The floor does not need to be lifted or replaced.

  • Wear layer thickness assessed before work commences
  • Fine orbital sanding — not drum sanding
  • Finish change available — oil to lacquer, light to dark stain
  • Glue residue removal on floating floors
  • Suitable for floors with 3mm+ wear layer only
Any age — wear layer assessment required
What's Included
The Full Scope
of Restoration
01

Full Sand-Back
& Refinish

A complete restoration — the floor is sanded back to bare wood in three passes and finished to the agreed specification. This is the foundation of everything else.

  • Pass 1: coarse grit — removes old finish and levels boards
  • Pass 2: medium grit — removes scratch pattern from pass 1
  • Pass 3: fine grit — prepares surface for finishing
  • Edges sanded with edging machine, corners by hand
  • Finish applied in two coats minimum
02

Gap Filling

Gaps between boards are filled with flexible wood filler mixed with the sanding dust from the floor itself — producing a colour match that is specific to your floor rather than generic. Applied after the first sanding pass, before finishing.

  • Flexible filler — accommodates seasonal board movement
  • Mixed with floor's own sanding dust for colour match
  • Applied after first pass, before second and third
  • Not suitable for gaps wider than 6mm — board replacement advised
03

Board Repair &
Replacement

Damaged, split or structurally compromised boards are replaced before sanding begins. We source period-matched reclaimed timber for Victorian and Edwardian floors — same species, similar age, similar grain character — so the repair is invisible once the floor is finished.

  • Reclaimed period timber sourced for historic floors
  • Like-for-like width and thickness matched
  • New boards aged with stain before the floor is sanded
  • Structural subfloor repair included where needed
04

Stain Change &
Colour Refresh

Changing the colour of an existing floor — or refreshing one that has faded or yellowed — is one of the most transformative things you can do to a room without touching anything else. A stain is applied after the final sanding pass and before the finish coat.

  • Full stain range — natural, grey, dark, white-washed
  • Custom stain development available for exact colour matches
  • Sample boards assessed in property light before committing
  • Compatible with all finish types — oil, lacquer, hardwax
05

Crack & Squeak
Treatment

Squeaking floorboards are caused by movement between boards or between boards and the subfloor. In most cases the cause is fixable — screws driven from above before sanding begins, or a flexible lubricant applied between boards. We assess the cause before recommending a method.

  • Cause assessed before treatment — movement vs friction
  • Screw-fixing from above on boards with movement
  • Counter-sunk, filled and sanded flush before finishing
  • Subfloor bracket repair where boards are lifting at joists
06

Parquet Block
Re-Adhesion

Loose and lifting parquet blocks must be re-adhered before any sanding begins — sanding over lifted blocks causes irreparable damage to the pattern. We lift, clean, re-bed with appropriate adhesive and allow full cure time before the first sanding pass.

  • All loose blocks identified and marked before work starts
  • Old adhesive removed from block and subfloor
  • Re-bedded with epoxy or polyurethane adhesive
  • Weighted and allowed to cure — minimum 24 hours before sanding
The Three-Pass
Sanding System

Every LIGNORA restoration uses a three-pass sanding system — coarse, medium, fine — regardless of how worn or how clean the floor appears. Cutting the process to two passes saves an hour. It also leaves a scratch pattern that becomes visible under raking light once the finish is applied. We do not cut it.

01
Coarse Pass

The first pass uses a coarse grit — typically 24 or 36 — to remove the old finish, level any unevenness between boards, and cut back to bare wood. This is the most aggressive pass and the one where the most material is removed. Direction follows the grain.

02
Medium Pass

The second pass — 60 or 80 grit — removes the scratch pattern left by the coarse grit. This is the pass most often skipped by operators trying to move quickly. Skipping it means the deep scratches from pass one are visible beneath the finish. We do not skip it.

03
Fine Pass

The final pass — 100 to 120 grit — prepares the surface for finishing. At this stage the wood is clean, flat and open-grained, ready to accept the stain or finish. Gap filler is applied between passes two and three and allowed to cure.

04
Finish Application

Finish is applied in a minimum of two coats, with a light buff between coats. The second coat is applied once the first is fully cured — not when it appears dry. Cure times vary by product and ambient conditions; we allow the full manufacturer-specified window.

Parquet restoration, Islington
Parquet Restoration · Islington
Victorian pine restoration, Dulwich
Victorian Pine · Dulwich
Edwardian oak restoration, Hampton
Edwardian Oak · Hampton
Dustless Sanding

All LIGNORA sanding work uses dustless sanding equipment — a vacuum system connected directly to the sanding machine that contains approximately 99% of the dust generated during the process. This means the job can be carried out in an occupied property with minimal disruption, without the full-house dust contamination that older open-drum sanders produce. We still ask that furniture is removed from the room being sanded and that neighbouring rooms are reasonably clear — but the floor can be sanded and finished while the rest of the house is lived in normally.

Before We Quote
We Assess
Before We Advise.

Not every floor can or should be restored. Some floors have been sanded too many times and have too little board thickness left. Some have structural damage that makes restoration impractical. Some are simply the wrong product for the room.

We visit the property, assess the floor in person, and give an honest recommendation — including, where relevant, whether restoration is the right choice or whether replacement would serve the client better in the long run. We do not quote for work we do not think will produce a good result.

Board Thickness Assessment

We measure remaining board thickness before advising on sanding. Boards below 8mm remaining above the joist level may not be suitable for a full sand-back. We advise accordingly.

Structural Condition Check

The subfloor is walked and assessed for movement, soft spots and any signs of rot or infestation. If structural work is required before sanding, we include it in the quote rather than discovering it mid-project.

Previous Finish Identification

Old wax, oil, lacquer and paint respond differently to sanding. Identifying what is on the floor before starting determines grit selection, sanding speed and whether any chemical stripping is required before mechanical sanding begins.

Honest Recommendation

If restoration is the right answer, we quote for it. If it is not — if the floor has been over-sanded, if the boards are too thin, if the material is not worth saving — we say so and discuss alternatives.

See also: Parquet restoration London →

See also: Best flooring for Victorian houses →

See also: Restoration cost guide →

"RESTORE"
Start With an Assessment

Tell Us About
Your Floor.

Send us a description and a photograph. We will tell you honestly whether restoration is the right answer — and if it is, we will come and see it in person before we quote.

Get in Touch → See a Restoration Project